How I Built a Browser-Based Sound Processing App with p5.js
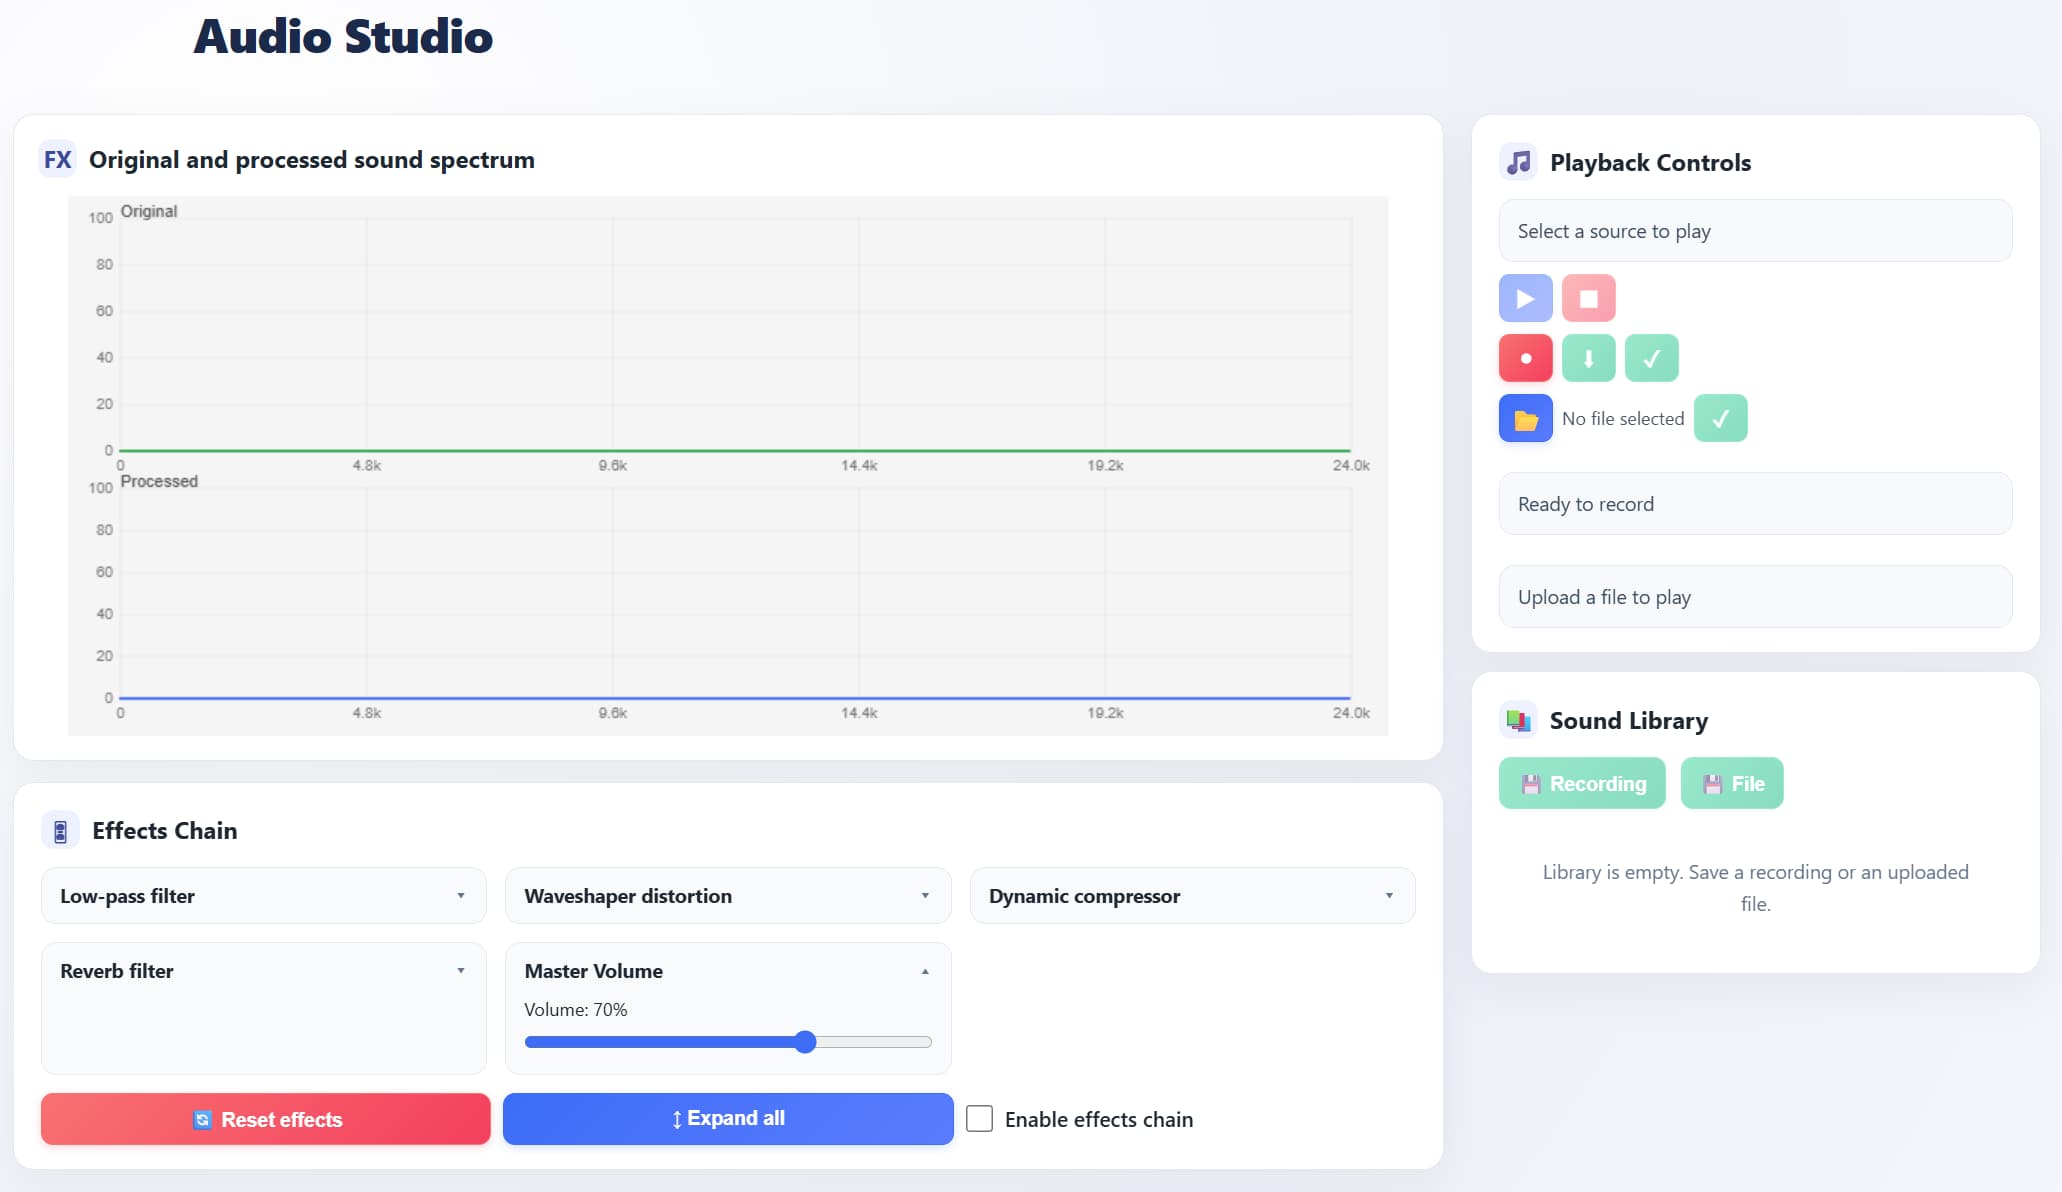
Audio Studio
If you’ve ever opened a DAW and thought “could I build something like this right in the browser?” — I gave it a shot. The result is a web application where you can record audio from a microphone or upload a file, run it through a chain of effects, see the spectrum before and after processing, and save the result to a local library.
No servers, no installation — just open a page and start working with sound.
Try It Live
Test the app here: AudioStudio Live
What Audio Studio Can Do
The app is built on p5.js + p5.sound (on top of the Web Audio API) and covers the full audio workflow:
- 🎙 Record from the microphone directly in the browser
- 📂 Upload audio files (WAV, MP3, OGG, M4A)
- 🎛 Process through five effects with independent dry/wet controls
- 📊 Visualize the spectrum of both original and processed signal in real time
- 💾 Save audio and all effect settings to a local library
- ⬇️ Export the processed result as WAV
All data is stored locally in the browser — no server required.
How It’s Built Inside
To keep the project from becoming one giant file, I split it into modules — each responsible for its own part of the audio pipeline:
| Module | Role |
|---|---|
| AudioBus | Central hub — routes the signal between source, effects, and output |
| EffectsChain | Effects chain with independent dry/wet mixing for each block |
| Visualizer | Two FFT analyzers + spectrum rendering via p5.js |
| Recorder | Captures the processed signal and assembles a WAV file |
| SoundLibrary | Saves audio and parameters to localStorage, loads them back |
This approach lets you modify or extend any component without touching the rest.
How the Signal Flows Through Effects
Every audio signal travels through the exact same chain — from input to output:
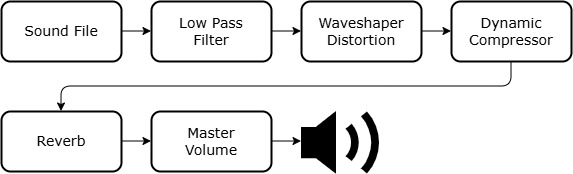 Figure 2. Internal signal flow of the application
The order is fixed — this sequence gives the most predictable results: first we cut unwanted frequencies, then add character, compress the dynamics, create space, and control the final volume.
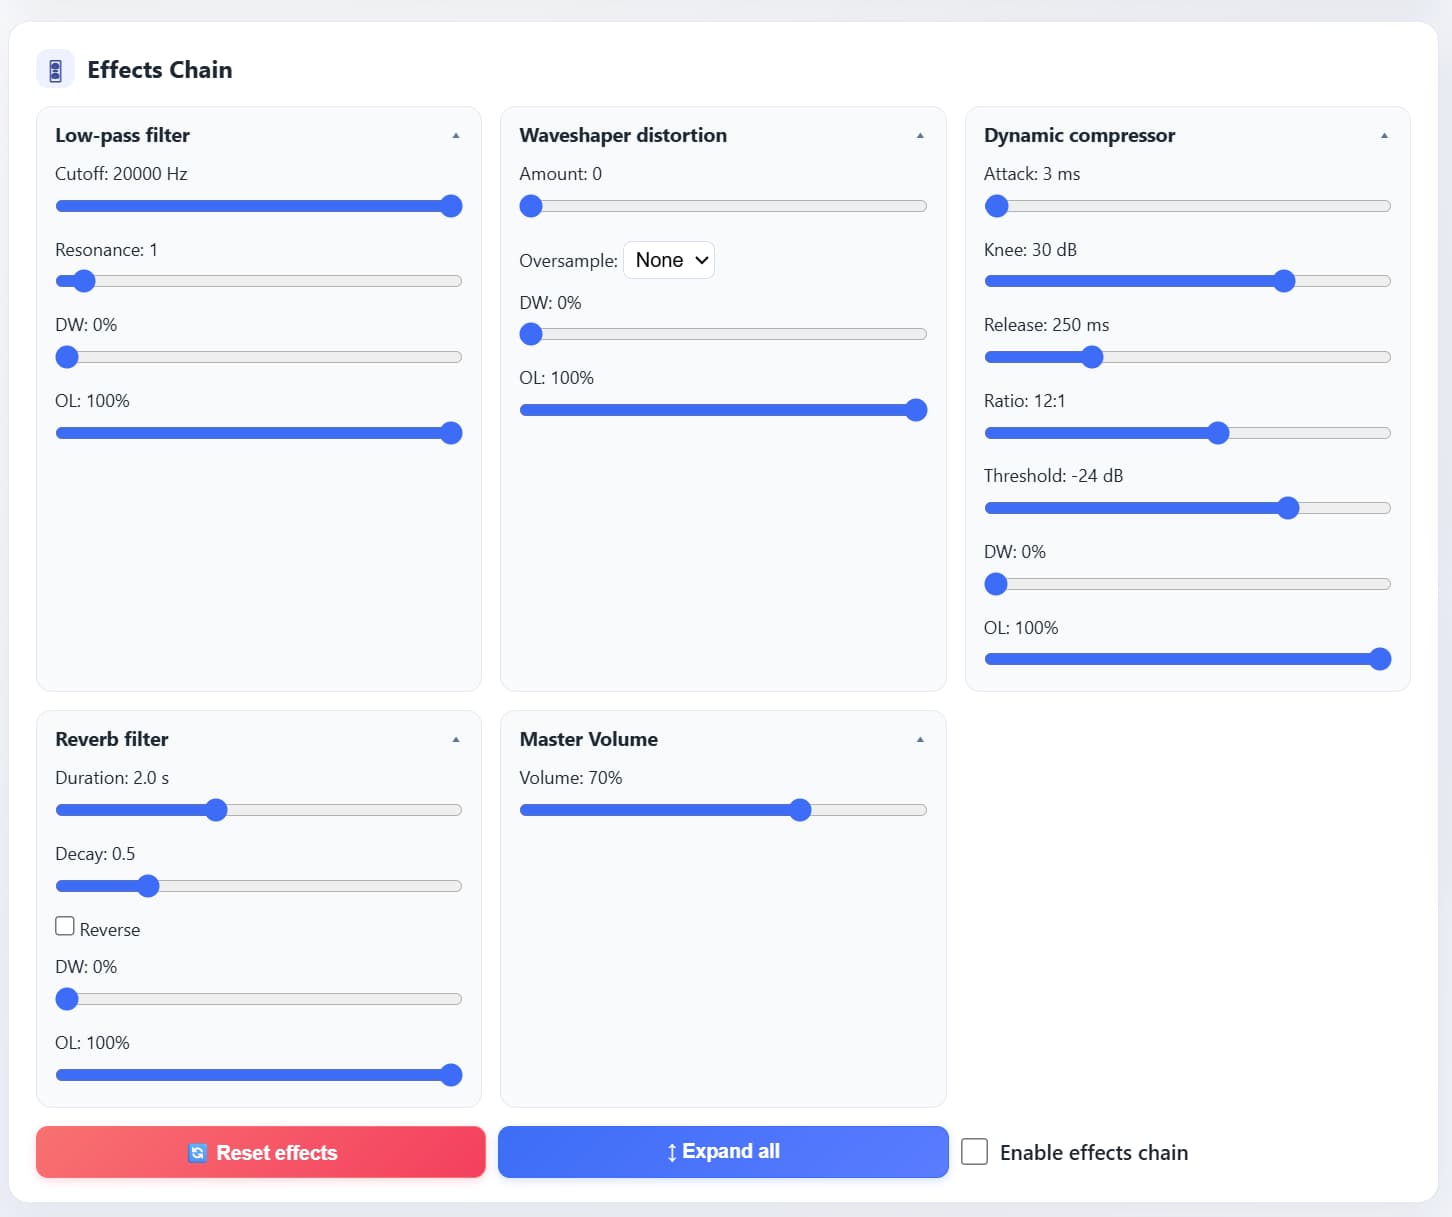
Five Effects — and Why Each One Matters
| Effect | What It Does | Parameters |
|---|---|---|
| Low-Pass Filter | Removes everything above the cutoff frequency — makes the sound “warmer” | Cutoff, Resonance (Q), Dry/Wet |
| Waveshaper Distortion | Reshapes the waveform, generating new harmonics — from subtle warmth to aggressive overdrive | Amount, Oversample, Dry/Wet |
| Dynamic Compressor | Evens out volume: brings up quiet parts, tames the loud ones | Threshold, Ratio, Attack, Release, Knee, Dry/Wet |
| Reverb | Creates a sense of space — from a small room to a cathedral | Duration, Decay, Reverse, Dry/Wet |
| Master Volume | Final volume knob before output | Volume |
Every effect (except Master Volume) has its own Dry/Wet control — you can blend in exactly as much processing as you need without losing the original signal.
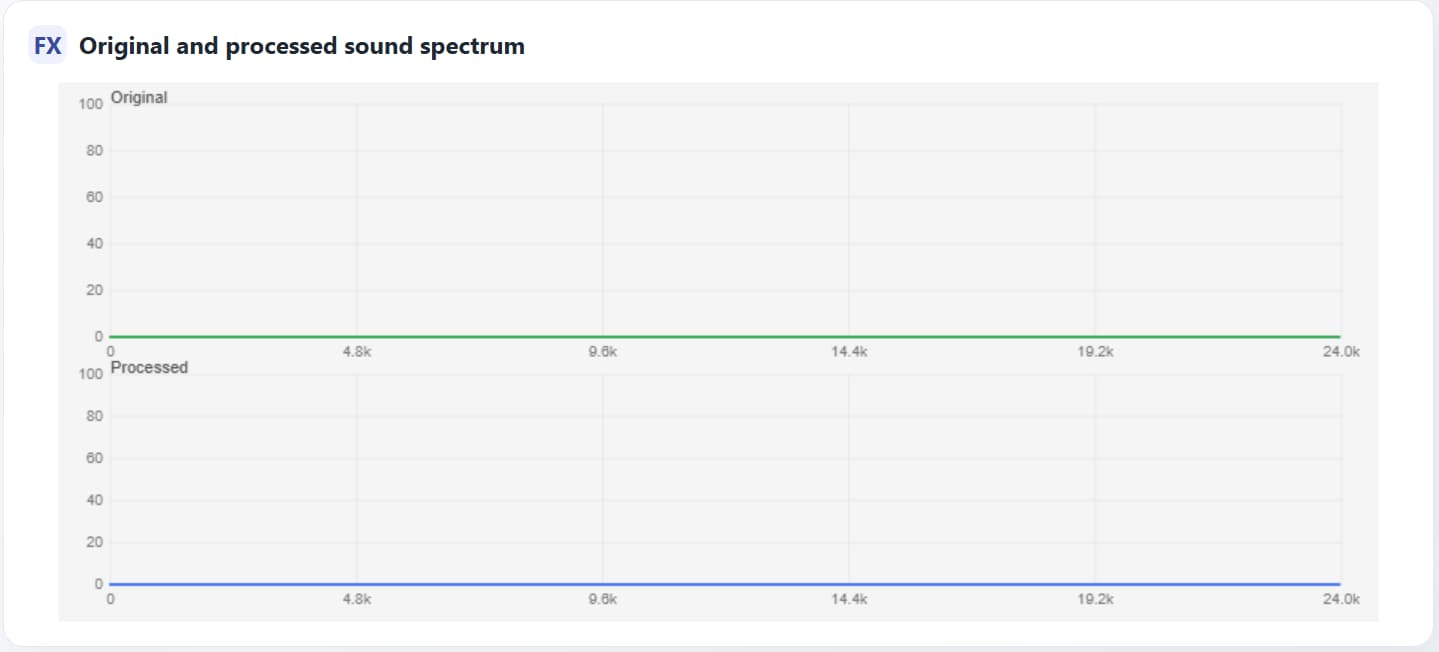
You See What You Hear
Two spectrum analyzers run simultaneously on screen:
- Spectrum In — the raw, unprocessed signal
- Spectrum Out — the signal after the full effects chain
Turn the Low-Pass cutoff — you immediately see the high frequencies disappear. Add distortion — new harmonics pop up in the spectrum. This turns effect tuning from guesswork into a deliberate, visual process.
Sound Library — Everything Is Saved
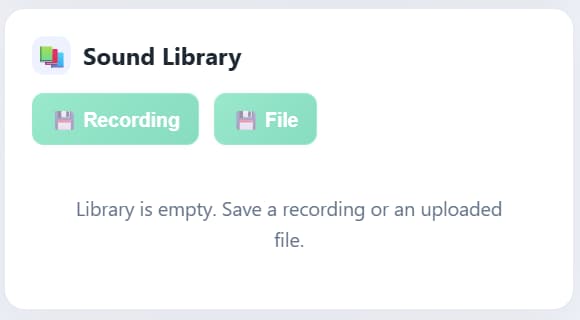
Any sound — recorded from the mic or uploaded from a file — can be saved to the library along with all current effect settings. Later you can:
- ▶️ play it back with the exact same parameters it was saved with;
- ✏️ edit the settings;
- 🗑 delete it when it’s no longer needed.
Under the hood — localStorage + JSON: audio is encoded in Base64, alongside sample rate and a full snapshot of every effect’s parameters. No backend — everything lives in the browser and survives page reloads.
What I Learned
This project leveled me up in several areas:
- Browser audio architecture — how to build a processing graph on top of the Web Audio API without drowning in callback hell.
- Real-time DSP — how filters, compressors, and reverb work in practice, not just in theory.
- State synchronization — how to keep the UI, audio logic, and localStorage in sync while the user tweaks knobs in real time.
What I’d Add Next
The project works, but there’s no shortage of ideas for the future:
- IndexedDB instead of localStorage — Base64 audio quickly eats up the ~5 MB limit.
- Presets and A/B mode — quickly compare two sets of settings.
- Library export/import — to transfer sounds between devices.
- More effects — EQ, delay, stereo widener.
- Loudness meter — visual level monitoring and automatic normalization.
Technologies
The project is written in pure JavaScript (ES6+) with no frameworks or bundlers. Open index.html — everything works.
- p5.js — 2D graphics, spectrum animation, user input handling
- p5.sound — Web Audio API wrapper: filters, compressor, reverb, recording
- HTML5 + CSS — interface without frameworks
- localStorage — persistent client-side data storage
Project Structure
1
2
3
4
5
6
7
8
9
10
11
12
13
AudioStudio/
├── index.html          # Entry point
├── app.js              # Initialization, module wiring
├── styles.css          # UI styles
└── js/
    ├── audio.js        # AudioBus — signal routing
    ├── effects.js      # EffectsChain — effects chain
    ├── visualizer.js   # Spectrum analyzer (p5.js)
    ├── recorder.js     # WAV recording
    ├── library.js      # Sound library
    ├── storage.js      # localStorage operations
    ├── synth.js        # Synthesizer (test signals)
    └── uploader.js     # Audio file upload
Source Code
All code is open — feel free to explore, star, and fork: